Blog Pages

Friday, May 31, 2013

"FREESTYLE FRIDAYS"

It's Julie's turn to share a Freestyle Fridays project today, and she's been playing with glitter . . . and die cuts and punches and a background stamp, and is that a little dahlia in the center of the flower?  Wow!  To learn all about this dimensional creation, we'll have to visit Julie's blog.  I'm sure she'd love it if we surprise her with a comment!

I have to brag on Julie girl.  Last Saturday evening, I pulled a package from the mailbox and was surprised to see that it was from Julie.  I wasn't expecting anything, and then it occurred to me that she might be thinking that I have a birthday coming up.  Yikes!  My birthday isn't until November!  When I opened the package, I pulled out a pretty, sparkly "thinking of you" card and . . . (drum roll) . . . a music CD for which she had created a custom label of a map featuring my hometown of Mocksville and other towns and cities that are near and dear to me.  Lake Norman is on the map, too, but the little town of Denver (where I live) just barely missed the crop line.  Knowing that I have been traveling back and forth to Mocksville for a while now, Julie loaded the CD with some of my favorite songs!!!  I was planning a trip to Mocksville the next day, and I sooooooooo enjoyed listening to the CD!  Julie has magical powers and seems to know exactly when to send special surprises.  The last time that I received a CD from her, I was on my way to Mocksville.  I had pulled the mail out of the mailbox as I was leaving my house and just happened to look through it while I was getting gas, and there was a surprise package from Julie . . . and a brand new Lady Antebellum CD.  Julie, THANK YOU (once again) for making my day (many of them, actually)!!!!  Give yourself another hug from me!!!!

Wednesday, May 29, 2013

INTERACTIVE GIFT BOX & CARD

Are you looking for a fun way to present a special birthday gift?  This fun, interactive box has a special drawer where you can place your gift.  When the recipient opens the drawer, out pops a special little note card where you can hide a message.  The fun gift box is sure to surprise whomever receives it, and the matching birthday card is sure to impress.
It looks like just another pretty box, but the surprise pop-out element takes it to a whole new level of awesome!  Amanda designed this project, and her complete tutorial can be found at Craft Project Central.

Tuesday, May 28, 2013

CARD FILE BOX

Here’s a cute and easy little box to store your cards in.  The box has dividers so you can sort your cards by different occasions.  This project also includes a business card or small note pad holder that can also be used for addresses and postage stamps!  Buffy Cooper designed this pretty project, and her tutorial can be found at Craft Project Central.

Monday, May 27, 2013

BRAND NEW PRODUCTS FOR "MAKE-IT-SNAPPY-MONDAY"

First of all . . . HAPPY MEMORIAL DAY, and THANK YOU to all veterans for your service and sacrifice!

Last Thursday, a box arrived from Stampin' Up! containing a "sneak peek" bundle of products that I earned (FREE!!!!) earlier this year during Sale-a-Bration.  I love to earn free products, and it's especially exciting to earn brand new items that won't be available until the launch of the new catalog which, thankfully, will be very soon.  Brand new products featured on this super snappy card include "Modern Medley" designer paper, "Happy Day" stamp set, and a really cute clip from the Essentials Hardware Clips assortment.  Other Stampin' Up! products featured include Very Vanilla card stock, Blossom punch, 7/8" Scallop Circle punch, pearl jewel, and Stampin' Dimensionals.

Enjoy whatever festivities you have planned for today, but don't forget to thank a veteran!

Sunday, May 26, 2013

BIRTHDAY GIFT BOX & CARD

This beautiful gift box is perfect for giving a small gift to a special person.  The matching card is sure to impress as well.  This fun project can be used for more than just birthdays . . . how about as a teacher appreciation gift or as a thank you gift to a friend or neighbor!
I love this cheerfully colored project!!  It was designed and created by Chris, and her tutorial is at Craft Project Central.

Friday, May 24, 2013

"FREESTYLE FRIDAYS"

I've had a lack of stampin' mojo lately but, as I was heading to bed a few nights ago, I got an idea for the Freestyle Fridays mission that Julie issued last week.  The mission was to use a retired Stampin' Up! color (I chose True Thyme) and one other color (Very Vanilla), but my project could only have one layer.  Hmmmm.  One layer . . . that's what really stumped me, and I may have bent the mission when I added the True Thyme ribbon bow, but that die-cut frame around the die-cut window on my card surely only counted as half of a layer.  Surely!  For the most part, I was quite pleased with this card, but . . . argh!!!!!! . . . the lacy embossed portion ended up inside-out, which I almost ALWAYS do when I use that embossing folder (Delicate Designs from Stampin' Up!).  It doesn't seem to matter that I feel the raised design in the folder before placing my card stock inside, trying to get it right . . . I guess I confuse myself with the flipping back and forth and almost always manage to get it wrong.  I should put a note on that folder to only use it on layers that I can flip.  The best part of making this card was getting to use the retired "Have a Seat" stamp set.  It may seem odd to have that bench behind the text, but it works and any occasion to use one of the "Have a Seat" stamps is good enough for me!  The sentiment is from a brand new stamp set, "Really Good Greetings".  I love that sentiment; however, it's one that will have to be used carefully since all situations don't end up "OK".  When I read it, I think of someone who loses a job and then (hopefully) will end up with an even better job--one they would have never found if they hadn't been forced to look.  Here's a look at the inside of the card.  If you click on the picture to open a larger view, you can almost see what the lacy embossed edge should have looked like on the front of the card.  ;-)
Thank you for yet another challenging mission, Julie!  Even when they stump me, they're still a lot of fun!

Thursday, May 23, 2013

BOX CARD WITH POP-UP SENTIMENT

I recently purchased some cut files for the Silhouette Cameo, and one of them was a box card.  I have attempted to make box cards in the past, but I was never very successful at getting them folded exactly perfect so that everything lined up like it should.  Having a cut file for the Cameo is really nice, mainly because I can now make box cards out of card stock without having to worry about it being too bulky!  When I started working on this box card, I was going to send it to my parents and include a note card (in a mini envelope) for each of them.  The front of the card is decorated with Stampin' Up!'s "This & That" designer paper, and I decorated the band that keeps the card closed with a large die-cut bird (Elegant Bird Bigz die) that I embossed with the Fancy Fan embossing folder and decorated with flower trim and a rhinestone brad for the bird's eye.
A really cool feature of this particular card is one that a friend recently showed me how to do . . . the pop-up sentiment!  When the box card is opened, the "thank you" sentiment pops up!  I used Stampin' Up!'s Decorative Label punch, small Oval punch, and Four Frames stamp set to create the layered sentiment.

Wednesday, May 22, 2013

CARD TOTE, OVAL BOX, & BEAUTIFUL CARDS AT CRAFT PROJECT CENTRAL

Have a blooming good time making this cheerful and pretty Best of Flowers card tote and cards!  In this project you will learn how to make an easy hidden message card and a scaled down version of an easel card.  Lot of crafting fun, and the set makes a wonderful gift for teachers, co-workers, neighbors, you name it!  
This beautiful ensemble was created by the talented Sharon Burkert, and her step-by-step photo tutorial can be found at Craft Project Central.

Another project that was recently posted at Craft Project Central, designed by Tara, is this pretty Oval Box & Card Set.
 A soft, delicate gift box. Perfect for filling with jewelry, candy or a small gift, this sturdy yet elegant gift box is sure to be a hit. Present it with the matching card and have a coordinating gift for that special person in your life.

Tuesday, May 21, 2013

SPOOL-SHAPED CARDS

Lately, I've enjoyed making spool-shaped cards and am sharing two of them in this blog post.  One of my favorite things about these cards is that the ribbon and buttons can be removed and put to good, creative use.  The first card features Stampin' Up! ribbon, buttons, Baker's twine, and a cute hanger-shaped clip, as well as an image from the retired "Sew Suite" stamp set.
The second card features the same (or similar) Stampin' Up! products, as well as a Vintage Trinkets pin and mini brad.  I used my Silhouette Cameo to cut both of the cards and the miniature scissors. It seems that I do a little something different to each spool-shaped card, and I end up liking "the next one" even better than the last one!
I have found that there are two things to take into consideration when making one of these cards . . . (1) Do I have buttons to match the ribbon, and (2) Do I have enough ribbon.  I would say that a spool card is perfect for ribbon scraps, but these cards call for a pretty long "scrap" of ribbon!  I haven't yet measured to see exactly how much ribbon I've put on any of the cards, but it's definitely enough that the recipient could use it on a few projects--if she can talk herself into "un-doing" the card.

Monday, May 20, 2013

"MAKE-IT-SNAPPY-MONDAY"

On Friday, I received the May My Paper Pumpkin kit, and I am so pleased with it!  I haven't begun the actual project (a brag book), but I used some of the papers and printed die-cut adhesives to create this quick card.  Each month, the kit contents are wrapped in tissue paper, and I used some of the tissue paper and Stampin' Up!'s 2-3/8" Scallop Circle punch to create the flower for my card.  

If you would like to subscribe to My Paper Pumpkin, just click on the "get it" picture under my photo in the left sidebar of my blog!

Friday, May 17, 2013

"FREESTYLE FRIDAYS"

Today feels like the second Friday this week because yesterday felt soooooooooo much like Friday to me.  I love Fridays, so I guess today is kind of like an extra treat for me.  It's Julie's turn to share an inspiring project for this week's edition of Freestyle Fridays, and pictured above is the sneak peek that she shared with me.  Isn't that a gorgeous frilly layer on her project?!?!  I love it, and I also love what those rhinestone jewels add to the stamped sentiment.  I hope you'll join me in visiting Julie's blog to see her entire project and to read all about it.  I'm sure she'd really love it if we also take the time to leave a little comment.  Be sure to read the Mission that she has for me because you might want to give it a try!  Have a terrific Friday (or whatever day you think it is)!!!!

Thursday, May 16, 2013

POCKET POUCH SATCHEL & CARDS

Sometimes you want just a little extra pizzazz when it comes to sending out a note card to someone special!  This project is perfect for that need.  This adorable satchel holds four coordinating cards and can be done up in lots of varied themes to appeal to almost anyone--young or old!  And while you’re at it, make several sets to have on hand for gifts!
This is such a pretty, feminine ensemble designed and created by Donna.  Her complete tutorial can be found at Craft Project Central.

Wednesday, May 15, 2013

"PLEASANT POPPIES" MOTHER'S DAY CARDS

For Mother's Day, I made several cards to send to a few special mothers, and I chose to use Stampin' Up!'s "Pleasant Poppies" stamp set.  I began by inking the stamp with VersaMark, and then sprinkled the stamped image with white embossing powder and heat set it.  Markers were used to color the images, and I chose coordinating ribbon for each card.  The sentiment is from "Teeny Tiny Wishes".

Tuesday, May 14, 2013

"THIS & THAT" DESK SET

With teacher appreciation week and the end of the school year quickly approaching, this desk set would be the perfect coordinating gift!  The projects in this desk set include note cards and a pretty note card holder to put them in, a pencil holder, Post-it note holder, and more!  In addition to teachers, this set makes a great gift for friends, neighbors, co-workers, and don’t forget to make a set for yourself!

Isn't this a gorgeous ensemble?  I think it has such a seasonal, feminine flair!  Heidi King designed this project, and her complete tutorial can be found at Craft Project Central.

Monday, May 13, 2013

"MAKE-IT-SNAPPY-MONDAY" GRADUATION TREAT

On Saturday, my nephew graduated--with high honors--from Early College.  This may not look like a grand enough gift for a graduate but, trust me . . . all that he will be interested in is the money that's folded and tied with Baker's twine in the bottom of the box.
The box was cut with my Silhouette Cameo and was so quick and easy to assemble.  I almost wish that I had other grads to celebrate this year, although I couldn't afford to tuck cash in many more boxes like this.  ;-)

Congratulations, Bryson Taylor Call, on your academic accomplishments!  I'm so proud of you and wish all the best for your future!

Saturday, May 11, 2013

CLUTCH PURSE CARD SET

Everyone needs cards, don’t they?  Well, here’s a card set anyone would love to have!  This card set includes six cards with coordinating envelopes and a pretty little clutch purse to put them in!  The set would make a great teacher gift for the end of the school year! 
Christy Fulk designed this cheerful project, and her tutorial can be found at Craft Project Central.
I love the colors used to create this ensemble, and that purse is simply adorable!!!

Friday, May 10, 2013

FREESTYLE FRIDAYS

When I sat down to create today's Freestyle Fridays project, I grabbed the card stock and Stampin' Up!'s new Mosaic punch and coordinating stamp set, Mosaic Madness.  With her post last week, Julie issued a mission for me to use Basic Gray, Bashful Blue, and Pear Pizzazz card stock, which was an interesting and unusual color combo for me.  I ended up not even using the stamp set, but I got somewhat creative with the Mosaic punch and the Modern Mosaic embossing folder and was quite pleased with the results.  Four of the mosaic shapes were punched from embossed card stock, and I then sponged the edges of them with Bashful Blue ink.  In the center, I placed a punched Pear Pizzazz flower (Itty Bitty Shapes Punch Pack).  The flower in the center was created with the 1-1/4" and 7/8" Scallop Circle punches and topped off with a itty bitty flower and pearl jewel.  I didn't have any Pear Pizzazz ribbon, so I used Old Olive and Bashful Blue satin ribbon to finish off the card.  I started to add a stamped sentiment, but I decided instead to let this be an "any occasion" note card.  Julie, thank you for inspiring me to step outside of my comfort zone and try a new color combo--it worked beautifully for me, just as it did for you last week!

Thursday, May 9, 2013

OH, THE FUN OF ACTION WOBBLES!

I'm on the Creative Team for a bulk buy group, and Action Wobbles are one of the products currently being offered.  Let me just say that they are fun, fun, fun to use . . . and so easy!  I used Stampin' Up!'s "Quatrefancy Specialty" designer paper (soon to be available from the new catalog) to decorate the front of this Rolodex.  I adhered an Action Wobble to the back of the numbers dial on the die-cut telephone, so the dial has a spin/vibrate motion that is just adorable.  It's impossible to capture the movement with still photography, but the close-up photo below (sorry for the washed out color) at least shows the blur of motion.
If you are interested in getting some Action Wobbles (or any other items available in the current bulk buy opportunity), email me for details.  My email address is randari at hotmail dot com.

Tuesday, May 7, 2013

BIRTHDAY EXPLOSION BOX

We celebrate birthdays the most it seems, and it’s hard to dress up money or a gift card that we so often give.  Make this birthday-themed explosion box that can hold a gift card, money, or small gift items.  It can also be used for a cute centerpiece for the party table!  When  you give this box, your present will look thoughtful and elegant!
Monika Davis designed this over-the-top project, and her tutorial can be found at Craft Project Central.  As always, there have been some awesome projects already posted this month, and there will be more so go ahead and get your subscription started!  You won't regret it!

Monday, May 6, 2013

"MAKE-IT-SNAPPY-MONDAY"

When I first saw this stamp set (Mosaic Madness), I knew that I wanted to create a background with some of the images.  Using the Stamp-a-ma-jig, I stamped the black images onto a piece of First Edition designer paper and then went back and stamped the small image in the center of the open designs with Pistachio Pudding ink.  The sentiment, which reads, "And it's all really good!" is from another brand new stamp set from Stampin' Up!, "Really Good Greetings".  Additional Stampin' Up! products used to create this card include Pistachio Pudding, Basic Black, Very Vanilla, and Basic Gray card stock, pearl jewel, and the following punches:  Mosaic, Postage, 1-1/4" Square.

Saturday, May 4, 2013

MY SPRING FRAMED ART FOR CRAFT PROJECT CENTRAL

When I create a project tutorial for Craft Project Central, I find myself really anxious to share the photo on my blog.  That's exactly how it's been since I completed the May tutorial, and the time has come to share my May project . . . this Spring framed art and coordinating cards.  The 3D butterflies were fun, but there's just something about the banner that makes me smile.
Butterflies are synonymous with Spring, and this framed art makes the perfect decor or gift for the season!  The banner that adorns the top left corner of the frame features letter tags that each have a decorative edge created from assorted punches, and the 3D butterflies are each decorated with a sparkly rhinestone jewel.  The bottom right corner of the frame is adorned with punched flowers that have a soda pop top in the center.  This ensemble also features four coordinating note cards!  Craft Project Central always has awesome and inspiring project tutorials!

SERIOUSLY . . . LOVE YOU

With the first My Paper Pumpkin (MPP) kit in March and the one that I received in April, I challenged myself to see how many "kicked up" creations I could design when using the kit contents and some other Stampin' Up! products.  This card features two stamps, a card, and printed card stock from the April MPP kit.  Additional Stampin' Up! products that I used were Lucky Limeade, Not Quite Navy, and Cherry Cobbler markers (to ink the stamps to create the tag), Very Vanilla card stock, Lucky Limeade ruffled ribbon, linen thread, Corner Rounder punch, and flower trim. 

You can subscribe to My Paper Pumpkin by clicking the link (directly under my photo) in the left sidebar.  Each month, I send to my subscribers project photos (with details and instructions as needed) showing alternate ways to use the kit contents.  In April, I sent a total of SIX alternate projects, one of which was a mini pizza box as shown below.
If you have questions about My Paper Pumpkin, let me know!  I'd love to add you to my list of subscribers and start sending some "kicked up" creative project ideas your way each month.

Friday, May 3, 2013

"FREESTYLE FRIDAYS"

It's Julie's turn to share a Freestyle Fridays project, and this is the sneak peek that she shared with me.  I think it looks like it could pass for a complete project, but we'll have to visit her blog to see the whole thing and read all about it.  Don't you just love that flower and bird silhouette image from "Serene Silhouettes"?  I silhouette images and wish Stampin' Up! had a lot more of them!  Be sure to visit Julie's blog, and don't forget to leave a little comment love while you're there.  ;-)

Thursday, May 2, 2013

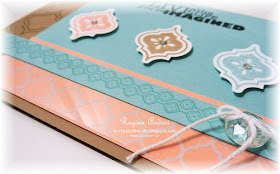
HUNGRY TO SEE NEW STAMPIN' UP! PRODUCT???? LET ME INTRODUCE YOU TO "MOSAIC MADNESS"

Demonstrators were able to pre-order select products last week from the 2013-2014 catalog, and my order arrived today.  It's always exciting to get new stuff, but it's especially exciting to play with brand new colors.  I am quite happy with the Color Refresh, but I already know that I will be sad to see the newest five In Color colors leave when their time is up.  Eager to start playing, I decided to create a card for Craft Project Central's Creating Pretty Cards Sketch Challenge #23.  I hope that you will feel inspired to submit a card for the challenge, and you might even win a free one-month subscription to Craft Project Central!
Stampin' Up! products featured on my card include "Really Good Greetings" and "Mosaic Madness" stamp sets, Mosaic punch, Vintage Faceted Designer Button, Baker's twine, rhinestone jewels, and the following card stock:  Baked Brown Sugar, Crisp Cantaloupe, Whisper White, and Coastal Cabana.  Notice the shiny printed strip at the bottom of the Crisp Cantaloupe layer?  It's a printed window sheet from the Quatrefancy Specialty designer paper collection, and the collection includes TWO 12x12 printed window sheets!!! 

I thought that I would like the Mosaic Madness products, but I didn't expect to love them.  Notice the background that I created on the left side of the Baked Brown Sugar card stock?  It would have been perfect if I had used the Stamp-a-ma-jig, but I like it just the way it is.

"HATS OFF" GRADUATION DECOR

Make this graduation set for your upcoming graduation party!  The individual graduation caps can be filled with treats for party favors!  Then you can fill the centerpiece graduation caps with money for the grad’s gift.  And, of course, a coordinating card ties it all together!  Those hats are soooooo adorable, and I am glad to have this project tutorial, designed by Julie, since my nephew is graduating soon.  With your subscription to Craft Project Central this month, you'll gain access to this tutorial and all of the others that post this month!

Wednesday, May 1, 2013

APRIL BONUS PROJECT ON CRAFT PROJECT CENTRAL

Have a creatively fun time making this box and set of cards using the adorable, Oh, Whale! stamp set!  Included in this project are three different card folds that you will be able to use again and again during your card making!  Sharon designed this truly awesome project, and her tutorial can be found at Craft Project CentralDid you know that you can still subscribe for access to all of the April tutorials?  While you're at it, go ahead and subscribe for May, too!