Saturday, December 31, 2011

ELEGANT BIRD & OTHER NEW PRODUCTS

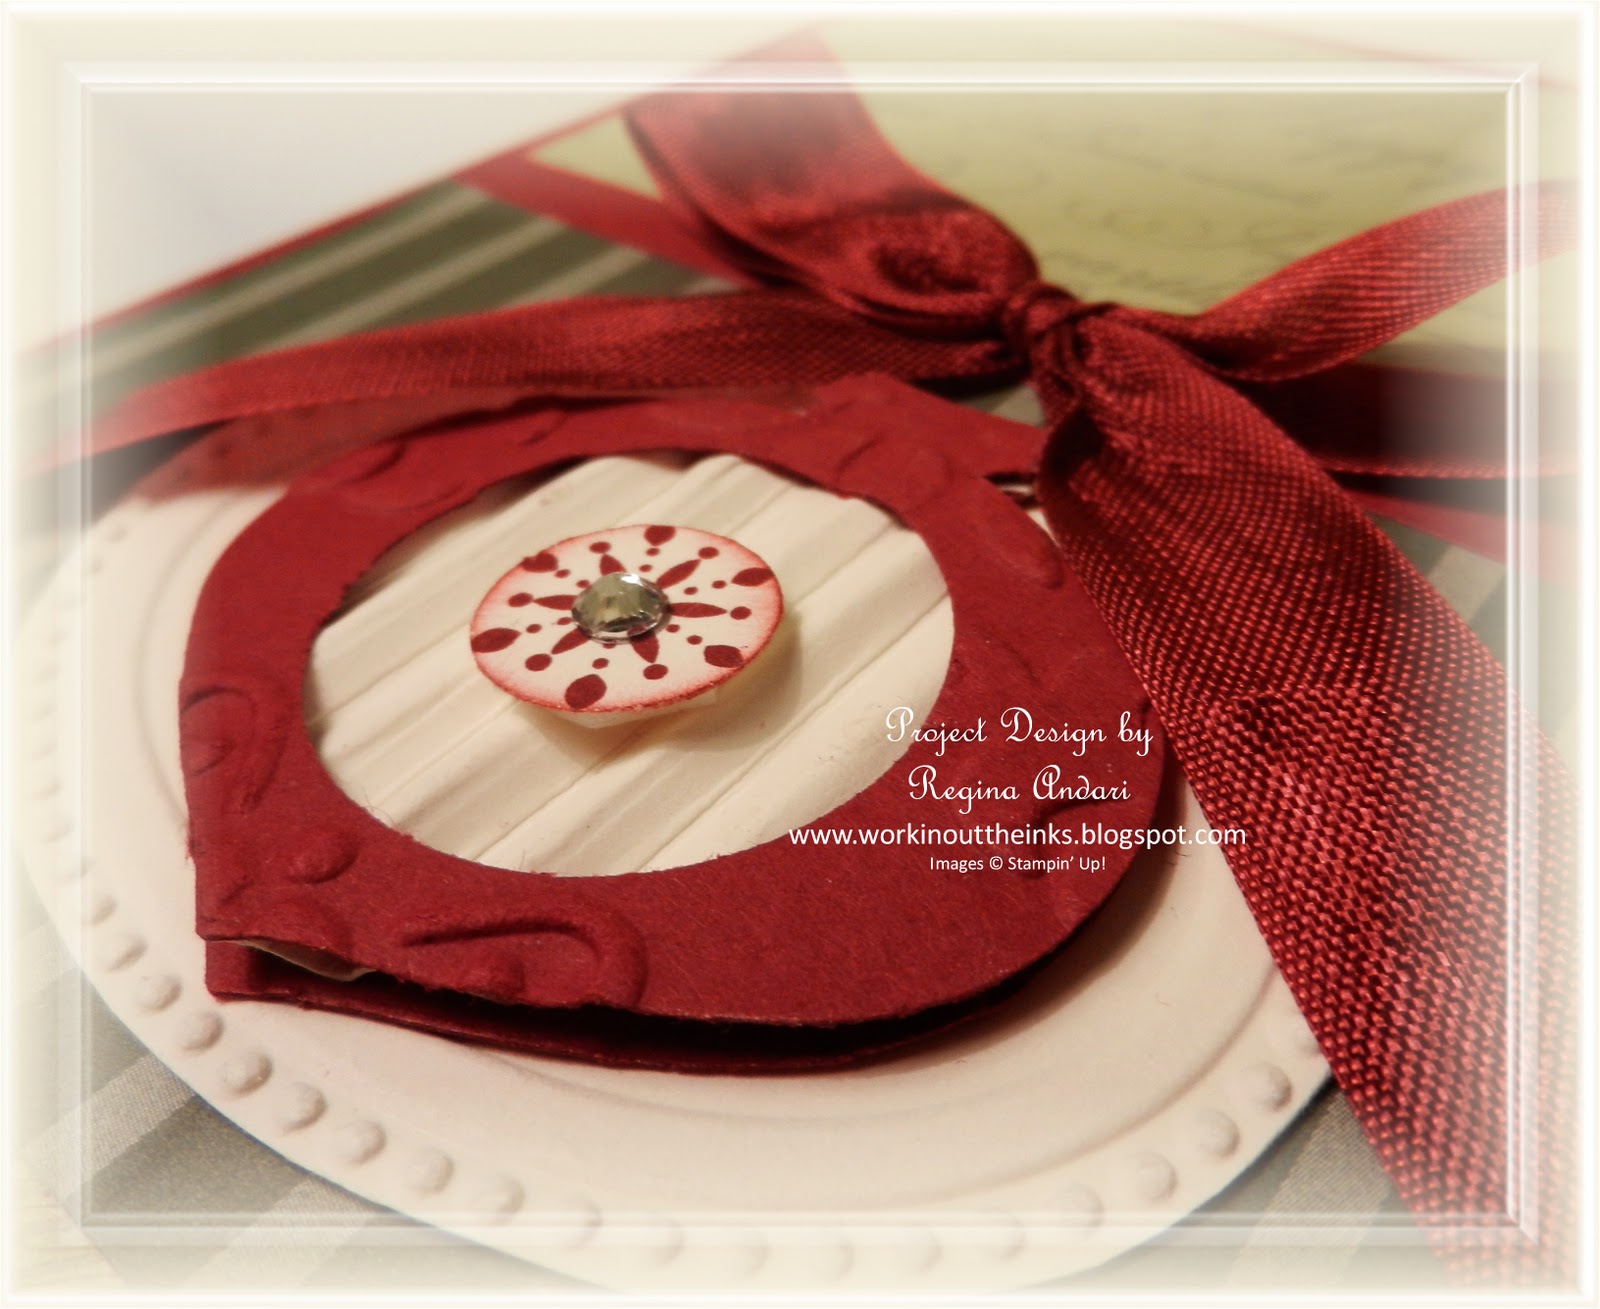
A couple of weeks ago, I busied myself creating swaps for my sweet friend, Laura, and this is one of them.  Are you loving Stampin' Up's "Elegant Bird" Sizzix die as much as I am?  This card actually features several new products that you'll find in the 2012 Occasions mini catalog . . . Adorning Accents Edgelits die, Adorning Accents embossing folder (including those adorable little embossed hearts), and Riding Hood Red pleated satin ribbon.  The inspiration for this card design came from p. 10 of the Occasions mini.  The designer paper used on this card is from the "Everyday Enchantment" collection in the Sale-a-Bration catalog.  Other Stampin' Up! products featured on this card are the sentiment from "Petite Pairs" stamp set, Very Vanilla taffeta ribbon, pearl jewel, and "Elegant Lines" embossing folder.  I wish you all a blessed 2012!

Friday, December 30, 2011

SWEET PRESSED COOKIE BOX & CARD

Your Valentine will know they are loved when you give them this pretty window box filled with cookies along with the matching card!  Don't those cookies look delicious?!?!  This project, featured today on Craft Project Central, is versatile enough to use for any holiday or occasion – just change the colors and stamps that you use!  Thank you, Lynn, for sharing this project and the tutorial.

Thursday, December 29, 2011

TURTLE & CO.

Since the moment that I first laid eyes on this adorable turtle, I vowed that he would be mine and--finally--he is.  It's unfortunate that he kept getting bumped off of my orders in exchange for something else, but isn't he simply cute????  Mr. Turtle is feeling a bit like me this week . . . under the weather and upside-down.  Did you know that for each "Turtle & Co." stamp set that is sold, Stampin' Up! will donate $3 to Ronald McDonald House Charities?  Other Stampin' Up! products used on this card include Early Espresso quilted ribbon, Square Lattice embossing folder, and Lucky Limeade Organdy ribbon (a Sale-a-Bration product).  You can order "Turtle & Co." for yourself and, at the same time, help support a worthwhile charity HERE.

Wednesday, December 28, 2011

A VALENTINE MINI CIRCLE BOX & CARD

The tutorial for this sweet ensemble, designed and created by Julie, was posted today on Craft Project Central.  Access to the tutorial (and all of the December project tutorials) is available with your subscription.

A BARN QUILT FOR MAMAW

This past summer, my sister, our sons, and I had a fabulous time on a mountain trip that took us far out of the way and onto an unexpected discovery in the NC mountains . . . a barn quilt trail!!!!  I cannot put into words the fun we had that day except to say that it was one of the BEST days of my life.  Shortly after that day, I made a barn quilt of my own and then my son and I decided that we should make one for my grandmother.  She's made many beautiful quilts, and she clearly deserves a barn quilt.  We looked at the pictures of barn quilts that we had taken while on the trail, and we looked at others online.  There were two design characteristics that we both really liked . . . the clever shading afforded by two colors of paint that mimicked dimension and interlocking squares.  My son, Chad, came up with this design, drew it onto the wood, and then painted this gorgeous work of art for my grandmother.  I am so proud of his design and this barn quilt and hope that I can convince him to make one for me.  You've heard the phrase, "No pain, no gain"?  This design wasn't an easy one to achieve, but it was "the" perfect design, and Chad wouldn't hear of ANY alterations.  I'm glad he stood his ground because it's even more beautiful than the computerized version and/or the printed prototype.  We still have a couple of touch-ups to do to this one, but we presented it to mamaw this past Sunday.  Chad, I'm sooooooooooo proud of you and your talent!!!  You totally rock!!!!!!

Tuesday, December 27, 2011

A DRINKING BIRD FOR EVERYONE


One of my favorite things about Christmas is having all of my family at my house on Christmas Day.  I always have a little something for them, and these four little packages were one of the treats for each of the families . . . a "Drinking Lucky Bird."  One of the things that I remember seeing at my grandparents' house was one of these birds on the coffee table, and we (the grandchildren) were always amazed at how the bird stayed in constant motion.  We didn't know, of course, that it was scientific (thermodynamics) . . . we were simply amazed.  When I saw these online the week before Christmas, I decided that I had to have one for each family member and sprung for expedited shipping to make sure they arrived in time.  My grandmother has probably not missed the drinking bird, and she now has a new one for her home.  Ha!  I enjoy mine and hope the other members of my family will enjoy theirs.

Monday, December 26, 2011

"MAKE-IT-SNAPPY-MONDAY"

Today's MISM project is a 3x6 card that features two of Stampin' Up!'s Sale-a-Bration products . . . 'Everyday Enchantment" designer paper and "Elementary Elegance" stamp set.  One thing that I immediately liked about the stamp set is that there's a cut-out of the Curly Label shape that can be used to stamp a shaped and colored background, such as the Pool Party background that I stamped onto Very Vanilla card stock.  I used the Curly Label punch on the Very Vanilla card stock, and I used the Sizzix Curly Label XL die to cut the Early Espresso mat for the punched shape.  Another new product featured on this card is the Pool Party seam binding.  How's this for an easy peasy card?  The new "Everyday Enchantment" designer paper collection is gorgeous, and you can get it FREE with any $50 Stampin' Up! order from January 24-March 31.  Have a great week!!

Sunday, December 25, 2011

LATTICE BOX & NOTE CARDS

MERRY CHRISTMAS!!!!!  I hope you're having a wonderful time celebrating with family and friends today!  At Craft Project Central, subscribers are treated to a FREE tutorial designed by Sharon

Saturday, December 24, 2011

MY "SELECT-A-SENTIMENT" PROJECT IS FEATURED TODAY

If you're like me, you're busy, busy, busy getting ready for the Christmas festivities tonight and tomorrow.  I will be hosting my family tomorrow, and it's always exciting to get the preparations in order.  On Craft Project Central today, my project (pictured above) is featured and, if you're a subscriber, you will have access to the tutorial.  Most of the projects featured this month have had a Christmas theme, but I wanted to design a gift item for Christmas but one that would be suited for everyday/any day.  I hope that you will visit Craft Project Central, and go ahead and subscribe to the site if you haven't already.  With your subscription, you'll have access to all of the project tutorials that have been showcased this month.  If you're still preparing gift items, my project just might be the easy one that you need.  Thank you for visiting my blog today!  I wish you and yours a blessed Christmas, safe travels and, most importantly, treasured time with the ones you love.

Friday, December 23, 2011

"APOTHECARY ART" CHRISTMAS CARD

This is one of the late Christmas cards that I made this year.  When my Occasions mini preorder arrived from Stampin' Up!, I couldn't resist creating with some of the new items, such as the Framelits dies and "Apothecary Art" stamp set.  This card also features the Snow Burst embossing folder and retired Stampin' Up! designer paper.  My colors are River Rock and Bravo Burgundy, and I definitely kept the design simple.  Looking at it now, I really wish that I had added a pretty bow.  Oh well, I suppose it's okay for a card to leave here without ribbon.  ;-)

Thursday, December 22, 2011

LIVE IN THE SUNSHINE

I don't know about where you live, but this has been a cloudy, rainy, dreary week, and I am ready to see the sun!  The project pictured above, designed by Sharon, is a bonus project posted to Craft Project Central today.  Bonus projects are available to subscribers who meet at least one of the following requirements:
~  Subscribe to two or more months in a row;
~  Put the Craft Project Central badge on their blog;
~  Let Craft Project Central know that you have referred a friend who subscribes.
If you have some time to create, why not take the Creating Pretty Cards challenge and post your card HERE?  At the end of the month, eight of the submissions will be entered into a drawing and FIVE lucky winners will get a FREE subscription to Craft Project Central.  Play along with us if you have time!

Wednesday, December 21, 2011

"RUE DES FLEURS" GIFT BOX

I have one more new project to share today which features a few new Stampin' Up! products . . . "Rue Des Fleurs" stamp set, Adorning Accents die and embossing folders, velvet ribbon (from the current Holiday mini catalog), and "Everyday Enchantment" designer paper.  Most of these products are from the upcoming Occasions mini and Sale-a-Bration promotion.  Other Stampin' Up! products used to create this project include the Sizzix Box #2 die, Naturals Ivory card stock, Baja Breeze card stock, Word Window, Corner Rounder, and tiny oval punches, linen thread, and pearl jewels.

"ATTIC BOUTIQUE"

Using one of the patterns from the "Attic Boutique" designer paper collection (Occasions mini catalog), the inspiration for this card came from one of the project samples on page 8 of the mini catalog.  Working with the pleated satin ribbon is heavenly--it just seems to do what you want it to do and, of course, it's gorgeous.  Another new product featured on this card is the "Adorning Accents" hearts embossing folder.  The hearts embellishment was created with two punched shapes from the "Heart to Heart" punch, one punched Jewelry Tag, "Tiny Tags" stamp set, and a rhinestone jewel.  I've already placed two (or is it three) preorders from the Occasions mini--it's simply FULL of fun-to-use, gotta-have products.  Stampin' Up! is making sure that we won't be bored with our paper creations in 2012!

Monday, December 19, 2011

"MAKE-IT-SNAPPY-MONDAY"

Stampin' Up! has some awesome new products coming your way in January, and I used a few of them to create this week's MISM project--a simple treat holder.  I began with a piece of 4" x 8.25" Early Espresso card stock and scored at .75, 4, and 7.25 inches.  This project features the "Everday Enchantment" designer paper and coordinating ribbon and brads, which are two of the upcoming Sale-a-Bration products, and it also features one of the new "Adorning Accents" Edgelits dies and coordinating embossing folder.  As you can tell, two different looks (decorative edges) can be created with these two new products--gotta love that!  Other Stampin' Up! products used include the Large Oval and 5-Petal Flower punches and cello bag.

BIRTHDAY CALENDAR DESK SET

Another awesome project tutorial has been posted today on Craft Project Central.  This one was created by Glenda, and it's not too late to subscribe to a month's worth of great ideas!

Saturday, December 17, 2011

CHRISTMAS CARDINAL

Every year it happens . . . the days seem to fly off of the calendar after December 1st, and I find it difficult to get much accomplished.  I started working on this card last week and finally managed to complete it this evening.  On Craft Project Central, there's a monthly Creating Pretty Cards challenge, and I created this card following the sketch for Challenge #6.  My card features the following Stampin' Up! products:  Very Vanilla, Basic Black, Basic Gray, Always Artichoke, Real Red, and Pumpkin Pie card stock, Lace Ribbon border punch, "Music Notes" image (printed as a border from My Digital Studio), "Teeny Tiny Wishes" stamp set, Two-Step Bird punch, rhinestone jewel, designer button, crochet trim, white gel pen, and a couple of other punches to create the cardinal. 

Friday, December 16, 2011

VINTAGE HOLIDAY ENSEMBLE

This beautiful ensemble is yet another addition to the projects featured on Craft Project Central this month.  Heidi did a fabulous job and shows creative ways to use a variety of Stampin' Up! products. 

"FREESTYLE FRIDAYS" SANTA SUIT

It's almost time for Santa to suit up and make the rounds and, since Julie challenged me last week to create a Santa suit project, I decided to try this cute design.  I think it was last year or the year prior when I first saw this project idea, and it was quite quick and easy to make--much like two 2-4-6-8 boxes.  Stampin' Up! products used to create this project include Real Red, Whisper White, and Basic Black card stock, Silver Glimmer paper (love this stuff), 3/4" square punch, craft knife (to very roughly cut the center out of the glimmery belt buckle), Postage Stamp and Tag punches, and "Christmas Punch" retired stamp set.  I used the faux flannel technique on the Whisper White card stock along the bottom of Santa's suit.  If you aren't familiar with this technique, all you have to do is crumple the card stock to break down the fibers, and then separate the layers by peeling them apart at one of the corners.  The broken fibers create a soft, flannel-like texture, which is exposed when the strip is adhered to your project.  This was one of the first techniques that I learned when I started stamping, and it's still a favorite.  It's also perfect for Winter projects and scrapbook layouts.

Wednesday, December 14, 2011

HOLIDAY SLIDING POP-UP

When my husband's cousin requested a special Christmas card, I knew exactly the kind that I would make . . . a sliding pop-up!  I love this interactive card because it's quite simple to make, and you can find Kim Score's tutorial for this fun card on splitcoaststampers.com.  The ornament itself was cut with my Cricut Expression, and I used a mix of other products to complete the card.  Stampin' Up! products used include the sentiment from "Heard from the Heart" stamp set, "Finial Press" embossing folder, Eyelet Border punch, and most of the card stock.
This is what the card looks like closed.
Isn't this a fun card???  I really like the way the focal point doesn't get lost when the card is "opened" to reveal the sentiment.  This is truly a great little interactive card!

Tuesday, December 13, 2011

SNOWMAN GIFT BOX TOWER

Another cute and clever holiday project was posted today on Craft Project Central and, if you subscribe this month, you'll be able to get all of the details and instructions to make your own.  Thank you, Amanda, for sharing this creative design!

Monday, December 12, 2011

"MAKE-IT-SNAPPY-MONDAY"

I'm still playing with new products and used "Fresh Vintage" (upcoming Sale-a-Bration stamp set) and "Apothecary Art" stamp set (from the upcoming Occasions mini catalog) to create this very simple card.  The floral image was stamped with VersaMark ink and then heat-embossed with white embossing powder.  I was going to lightly sponge Soft Suede ink on top of and around the embossed image, but then decided to just dirty up the entire front of this square card.  Other Stampin' Up! products used to create this card include Soft Suede taffeta ribbon and Postage Stamp punch.

Sunday, December 11, 2011

GINGERBREAD TREAT BOX & CARD


Isn't this adorable???  This project ensemble, designed by Kim, was posted yesterday at Craft Project Central, along with a detailed photo tutorial.  It's not too late to subscribe to the December session and gain access to some awesome creations.

Be sure to visit my blog tomorrow for my super easy Snappy Monday card featuring one of the stamp sets that will be available during Stampin' Up!'s upcoming Sale-a-Bration promotion.

Saturday, December 10, 2011

ELEGANT BIRD MINI ALBUM

One of the new products found in Stampin' Up!'s "Occasions" mini catalog is the Sizzix "Elegant Bird" die, and this is the project that I envisioned when I first laid eyes on that die.  It's a mini album, which uses die-cut wings for pages.  Late last night, I put myself "in the zone" to create this project, and I spent hours on it!  Seriously . . . I watched as the sun rose, daylight crept in, and I realized that bedtime had become nap time at 9 this morning.  Did you know that once you pass the stage of barely able to hold your eyes open, your eyes begin to feel like they have forgotten how to close?  I don't know how else to describe that feeling.  Anyway, I am in love with this little project, which I still need to finish.  Notice the pretty designer paper?  It's from the "Twitterpated" collection, and it is gorgeous.  Actually, all of the new designer papers that are coming soon are over-the-top beautiful, and several of them have that vintage, antique feel that totally appeals to and inspires me.  Stampin' Up! truly did a step-up job with the paper designs, and the new Sizzix products are . . . what's a good word to use . . . magnificent!  Other new products featured on this project are the Cherry Cobbler Dazzling Details, edge embossing that coordinates with a new Edgelits die, a small Framelits cut from the Labels Collection dies, and gorgeous, easy-to-work-with Riding Hood Red pleated satin ribbon.  You may be wondering if I broke the bank with my preorder, and the answer is an emphatic YES!  If you'd like a larger view of the pictures (and you know you do), just click on them.  ;-)

Friday, December 9, 2011

"APOTHECARY ART" & NEW FRAMELITS!!!!

Woohoo!!!!!  My Occasions mini preorder arrived today and O-M-G . . . what fun!!!!  This is the first project that I made with some of my new goodies.  It's a shaped card and, if you've been following my blog for a while, you know how I {heart} shaped cards.  I used brand new Framelits dies to cut the card (which is hinged on the side), the Rose Red layer (sorry . . . the colors are off on this overcast day), and the smaller stamped layer.  Start digging under cushions and racing children to pick up coins in parking lots because there are some awesome new products coming soon.  The stamped image is from a new stamp set, "Apothecary Art," which coordinates with the dies that I used.  I used a combination of ink, aqua painter and believe it or not, Stampin' Pastels to color my stamped image.  And yes, I used the Square Lattice embossing folder on the Rose Red layer.  Sadly, I have to go shopping this evening and leave my new goodies, but I'll definitely be sharing more new product sneak peeks as I get a chance to play.

"FREESTYLE FRIDAYS" HO! HO! HO! PROJECT FROM JULIE

Julie sent me the picture for her Freestyle Fridays project last night, and it looks soooooooo cute.  Of course, we'll have to visit her blog to see the whole thing and get the details but, from what I can tell, it's a cute Santa suit.  I don't know how Julie keeps coming up with great ideas, but she inspires me.  Be sure to visit her blog, and don't forget to leave some comment love.

A LITTLE LATE, BUT WORTH THE WAIT

I have mentioned Craft Project Central and the fact that I had the opportunity to be a guest designer this month, but I totally forgot to post pictures of the projects from week 1.  Duh!  I'm sure you'd like to see the awesome projects that you will find this month.  If you subscribe to the site, you will find tutorials for all of the projects that are posted, such as the following works of art.  Aren't these projects adorable????

Dec 1:  Baroque Motifs Christmas Card Set by Monika

Dec 4:  Holly Berry Bouquet Card Set by Laurie

Dec 7:  Mr. Snowman Treat Box & Card by Julie

There's still plenty of month left, so hop on over to Craft Project Central and get your subscription started!  $10 for 10 projects featuring Stampin' Up! products . . . what a great treat for YOU!


Wednesday, December 7, 2011

AND THE WINNER IS . . .

CONGRATULATIONS, ARLENE!!!!
You have won the FREE pass to Craft Project Central,
and I know you'll enjoy it. 

Tuesday, December 6, 2011

A GIFT FOR A FRIEND

My hair stylist loves anything French and, when I saw the 5x7 postage stamp art at Ikea last night, I immediately thought of her.  By the time I got home, I decided to put together this framed art to give to her for Christmas.  The designer papers that I used are from g.c.d. studios, and the ribbons and rhinestone jewel are from Stampin' Up!  I used Stampin' Up!'s Lace Ribbon border punch on the designer paper layer near the top of the 8x8 frame.  I love gifts like this that are a snap to put together!  I also used some of the designer papers to make a set of note cards and custom envelopes, but I didn't take a picture of them before wrapping the gift.  Au revoir!

Monday, December 5, 2011

"MAKE-IT-SNAPPY-MONDAY" . . . AND A GREAT GIVEAWAY!!!!

Today's MISM project features a really neat technique . . . an accordion-folded center for the ornament, which is the focal point of this card.  The accordion is very simple to create--like any other accordion--and I just placed adhesive on the mountain folds and sandwiched a Cherry Cobbler punched ornament shape on the top and bottom of it.  The ornament was adhered to a Very Vanilla embossed oval that was laying on my desk, and I built the remainder of the card around this focal point.  All products used are from Stampin' Up!.  I can't remember the name of the retired designer paper that I used, but the other products are Very Vanilla, River Rock, and Cherry Cobbler card stock, seam binding, rhinestone jewel, Ornament punch, "Snow Swirled" stamp set, and Vintage Wallpaper and Designer Frames embossing folders.  And now . . . for the fun giveaway.  I have the opportunity--the honor--of being a guest designer for Craft Project Central this month, and I have one FREE SUBSCRIPTION PASS to give away.  All you have to do to be in the drawing for this pass is leave a comment on this blog post.  I will use random.org to choose the winner, but you must act fast . . . I will draw the winner on Tuesday evening at 8:00 p.m. 

Sunday, December 4, 2011

A POP-UP CARD FOR MAMAW S

Yesterday was mamaw S's birthday, and this is the sliding pop-up card that I made for her.  I found the instructions on SCS, and it was one of the easiest interactive cards that I have ever made.  Stampin' Up! products used to create this card include Lucky Limeade, Elegant Eggplant, Whisper White, Wisteria Wonder, and Calypso Coral card stock, "Berry Blossoms" designer paper, "Sew Suite" and "Happiest Birthday Wishes" stamp sets, designer button, linen thread, Baker's twine, Eyelet Border punch, Round Tab punch, 1-1/4" Circle punch, paper-piecing technique, and a "Sweet Stitches" fabric-covered designer brad.  One of my favorite things about this pop-up card, besides how easy it is to make, is the way the focal point can still be on display when the card is "open."  Interactive cards aren't always made in a way that is conducive to being displayed, but this one is perfect.  I will definitely make more of these cards!

Friday, December 2, 2011

"FREESTYLE FRIDAYS"


Well, here we are again . . . it's Friday and time for Freestyle Fridays.  Man, the Fridays are just coming around so quickly!  Last week, Julie challenged me to create a "little gift" -- anything but a card.  If you didn't see her project last week, be sure to check it out HERE.  The sweet ladies who attended my November class got to make a mini loaf box similar to the one pictured above and, since I love this project so much, I decided that I would make one for today.  Instead of using it to hold something baked and delicious, I decided to toss in two mini jars full of buttons.  This would constitute a fun gift for most everyone that I know.  I have to tell you that the inspiration for the mini loaf box came from my friend, Laura.  She sent me a precious box last year, and I kept that box on my stamp shelf for ONE WHOLE YEAR because I didn't want to forget to let my customers make one for this holiday season.  I used all Stampin' Up! products in the making of my box . . . "Letters to Santa" designer paper, Early Espresso 1-1/4" striped ribbon, Eyelet Border punch, Scallop Circle punch, Ornament punch, Word Window punch, 3/4" Circle punch, Snow Burst embossing folder, Whisper White, Old Olive, and Early Espresso card stock, "Delightful Decorations" and "Short & Sweet" stamp sets, and Baker's twine.  This is definitely a project that can be made with or without lots of detail.  Thanks again, Julie, for the fun "mission," and thanks to Laura for the project idea!  Have a great weekend, and visit me on Monday for another "snappy" project . . . PLUS . . . a really FUN giveaway opportunity that you won't want to miss!

Tuesday, November 29, 2011

REMEMBERING MAMAW C


Today I'm sharing a layout that I designed two months ago for my scrapbook club because it features a picture which includes my mamaw C who passed away yesterday morning.  On page one, my sister and I share the spotlight in a rare photo with both sets of grandparents, and mamaw C is on the left.  Following is what I posted on Facebook yesterday:

     She was a sweet woman--a gentle soul--and when she laughed, it was almost like a mischievous giggle.  She was a great cook, and her sweet tea was to die for.  She let me eat from the sugar bowl that she kept on the table, and she didn't mind if I stole a biscuit, still steaming-hot from the oven.  I later learned to appreciate that she wouldn't let me try that cocoa-looking stuff that she'd pour into the round metal lid and then pour behind her lip.  Her memories left her too soon and, this morning, she left us.  I know that Heaven and my mamaw are celebrating on this day.


Monday, November 28, 2011

"MAKE-IT-SNAPPY-MONDAY" . . . ANOTHER SCRAPLING


Today's MISM project is truly a snappy one, and it's also a scrapling . . . a card created from a scrap that I pulled out of the box of cut card stock that needs to be sorted and filed.  Stampin' Up! products used include Early Espresso, Pool Party, and Very Vanilla card stock, "Pennant Parade" stamp set, "Spice Cake" designer paper, and pearl jewels.  For the die-cut shapes, I used some Spellbinders' and Tim Holtz dies.  Don't you just love scraplings?  They put scraps to good use, and there is no right or wrong way to use them.  I think it's fun to create cards that aren't the standard size.  This reminds me that when I was first introduced to Stampin' Up! at a workshop, I thought the cards we made were quite small.  I was used to store-bought cards, which seem huge to me now, but it didn't take long for me to fall in love with the standard A2 card . . . and look at me now . . . you never know what size card might get dropped in the mail.  

Friday, November 25, 2011

VINTAGE "SEWING ROOM" CARD

My sister had a birthday this past Tuesday, and this is the card that I made for her.  Somehow, I just know that it will find a permanent place in her sewing room.  My sweet niece, Haley, gave me the "Sewing Room" die for my birthday that I used to cut the dressform and thread spool.  Card stock wasn't going to be sturdy enough for this card, so I cut two additional shapes from thin chipboard and adhered the Early Espresso die-cuts to them.  The two pieces are adhered at the top with adhesive, and I created a score line on the front piece so the card would open easily.  Stampin' Up! products that I used include crochet trim, Jewelry Tag punch, "Pennant Parade" stamp set, hemp twine, linen thread, and designer button.

JULIE'S "FREESTYLE FRIDAYS" GIFT PROJECT

Today it's Julie's turn to share a Freestyle Fridays project with us, and it appears that she has created a neat little gift of nail files.  If you're like me, you really enjoy stamped gift ideas--especially this time of year--and Julie does a great job with these.  It amazes me sometimes how she can come home from a long day at work and create some type of gift that's needed ASAP.  I hope that you will join me in visiting Julie's blog to see and learn more about her project, and I know that she would appreciate it if we would take a few seconds to leave a comment. 


Since the holidays have officially begun, it seemed like the perfect time to change my blog banner to reflect the Christmas season. Of course, I used Stampin' Up!'s My Digital Studio to create the design and hope you like it!  DON'T FORGET . . . Stampin' Up! has kicked off the holiday season with an Online Extravaganza.  If you haven't already checked it out, you can do so HERE.  Any time is a great time to purchase My Digital Studio, but you can purchase the Express version (downloadable) from my web site during the Online Extravaganza and receive the Express Booster Pack FREE!!!  The booster pack, combined with My Digital Studio Express, would give you the same content as the $79.95 version that comes with installation CDs.

Wednesday, November 23, 2011

"MOCHA MORNING" HOLIDAY ENSEMBLE

This project ensemble was designed for the Christmas session of Stampin' Fun and Friends, a subscription site for stamped project ideas and tutorials.  Stampin' Up! products used to create this holiday framed art, as well as the coordinating tag and greeting card, include:  Mocha Morning Specialty designer paper, "Welcome Christmas" stamp set, antique brad, black satin ribbon, "Hand-Penned Holidays" digital stamp set, Sizzix Serif Essentials alphabet dies, Sizzix Two Tags die, Scallop Edge border punch, Wide Oval punch, and linen thread.  I used My Digital Studio and the "Music Notes" digital stamp brush set to create the borders for the framed art and the bottom of the tag.

Tuesday, November 22, 2011

TRYING FRAMELITS AND STAMP-EMBOSS SETS

The first card that I'm sharing today was created with a Sizzix "stamp and emboss" set that I recently purchased.  I used Stampin' Up! markers to ink the stamp and then used the coordinating embossing folder to emboss the stamped image.  Sponging Soft Suede ink on the embossed image added definition and depth.  Other Stampin' Up! products used to create this card include Itty Bitty Shapes punches (small heart), pearl jewels, "Short & Sweet" stamp set, oval punches, and dotted grosgrain ribbon.  For the second card, I used the Sizzix "Chandelier" stamps and coordinating Framelits dies.  It was nice to be able to try Framelits dies because Stampin' Up! will be offering some of them early next year, and I know now that they are going to be AWESOME!  My little card features a sentiment from "Teeny Tiny Wishes" stamp set, Wisteria Wonder card stock, designer button, linen thread, and a punched eyelet border.  To see a larger view of either of these cards, just click on the pictures.

Monday, November 21, 2011

"MAKE-IT-SNAPPY-MONDAY" . . . BOXED AND BORDERED

Today's MISM project is another easy box--4" square, 2" deep.  I had created the stamped snowflake topper to use for a card, but it ended up laying on my desk waiting for a place to call home.  Stampin' Up! products used to create this box include Soft Suede, Not Quite Navy, and Whisper White card stock, Snowflake punch, Dazzling Diamonds glitter (on the punched snowflakes), "Short & Sweet" and "Snow Swirled" stamp sets, linen thread, pearl jewels, 5/8" silver brad (topped with pearl jewels), and Lace Ribbon Border punch.  Not Quite Navy is one of Stampin' Up!'s older colors and, for several years, I hardly used it; however, I have taken quite a liking to it, maybe because it is a striking compliment to a favorite of mine, Soft Suede.

Sunday, November 20, 2011

CHRISTMAS COMES EARLY

For quite some time, my husband and son have  wanted me to have a new camera, but I have resisted.  The camera that I have used for years has a neat little dock that sits on my desk, and it seems that cameras with docks have become extinct.  I know that technology keeps pushing us forward, which is supposed to be a good thing, but I loved my little dock!  My guys decided to go ahead and purchase a new camera for me--this red beauty--and gave it to me early when I had an issue with my beloved (scratched and dented) outdated camera.  So far, I like this one a lot!  There's so much to learn, but you'll see what kind of pictures it takes with my "Make-It-Snappy-Monday" project tomorrow.  ;-)  I used Stampin' Up!'s My Digital Studio to "holiday up" the photo.  I hope you're having a wonderful Sunday, and be sure to visit me tomorrow!